A DIY Guide: How to Install Bidet Sprayer
Staring at that shiny new bidet sprayer, but a bit lost on how to get it up and running in your bathroom? 💦 You’re not alone, friend!
This task can feel like trying to assemble a puzzle with no picture on the box.
Frustrating, right?
Well, chill out! 🍹 We’ve got you covered.
This guide is your secret weapon to conquer the bidet installation battlefield.
With simple, clear steps, it’ll have you transforming your bathroom into a hygienic haven in no time.
Stay tuned and let’s tackle this together! 👊🔧
Table of Contents
Preparation for Installation
Tools Required
Before you dive into the world of bidet sprayer installation, make sure you’ve got your toolkit ready.
Here’s what you’ll need:

- Wrench or Spanner: For tightening and loosening connections.
- T-Valve: The crucial part that connects the water supply to the bidet spray.
- Scissors: For cutting any excess material.
- Bidet Spray: The star of the show!
- Plumber’s Tape or PTFE Seal Tape: To ensure a leak-free connection.
🛠️ Gather these tools, and you’re all set to begin!
Checking Water Supply Line
Before you start, take a moment to check the water supply line.
Locate the water supply valve, usually found by the wall near the water closet.
Make sure everything is in good condition and ready for the new addition of a bidet sprayer.
Turning Off Water Supply
Safety first! 💧 Turn off the water supply to avoid any unexpected splashes or leaks.
Find the water supply valve and turn it off.
This ensures a dry and safe working environment as you install your new bidet sprayer.
Installing the Bidet Sprayer
Disconnecting the Water Supply Line
Ready to take the plunge? 🚿 First, you’ll need to disconnect the water supply line.
Locate the fill valve underneath the toilet and use a wrench to unscrew the water supply line.
Keep a bucket and rag nearby, just in case any water leaks out.
You’ve got this! 💪
Installing the T-Valve

Next up, the T-Valve!
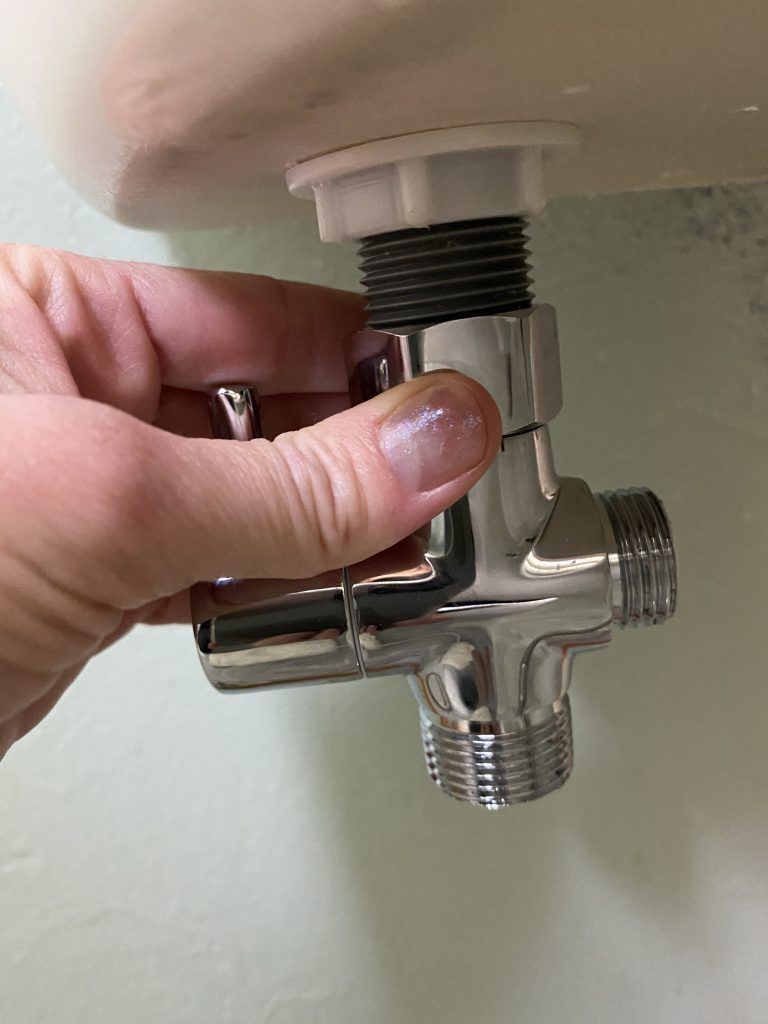
Make sure the flat rubber washer is snug inside the top of your bidet’s T-valve.
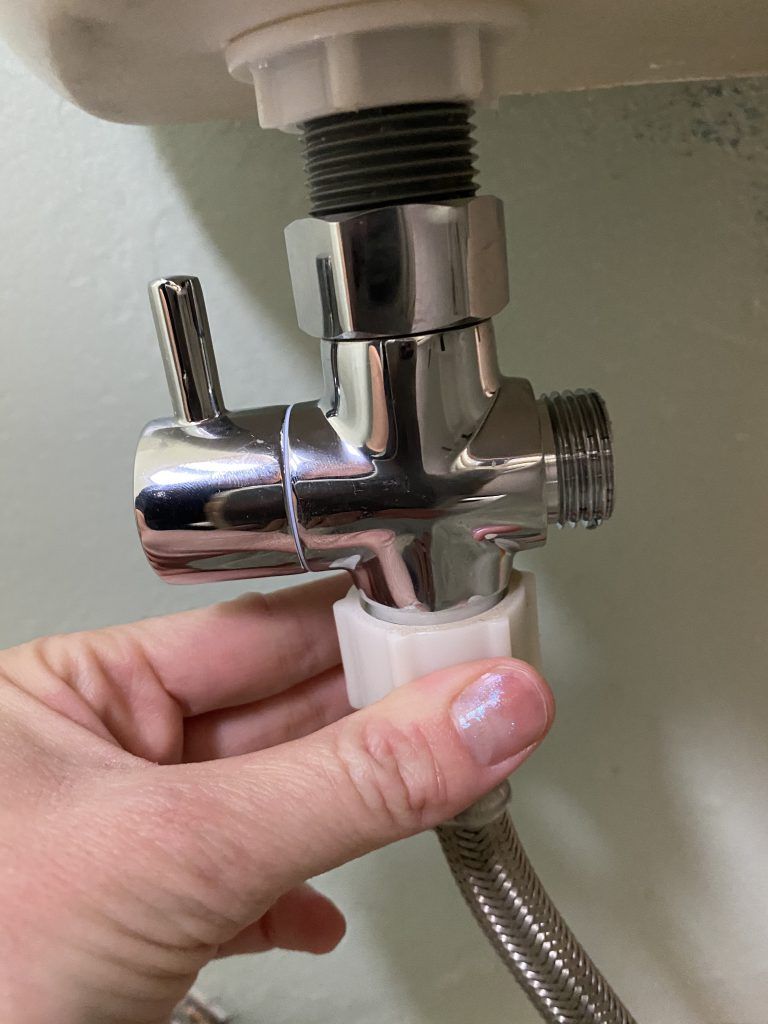
Then, attach the T-valve to the toilet’s fill valve where the water supply line was previously unscrewed.
It’s like fitting a puzzle piece in the right spot! 🧩
Attaching the Hose to the T-Valve

Now, wrap the bottom of the T-valve with PTFE seal tape (that leak-free magic tape!) and screw the water supply hose to the bottom of the T-valve.
It’s all about creating a water-tight connection.
No leaks allowed here! 🚫💧
Attaching the Bidet Spray Holder
Time to find a home for your bidet spray holder.
Attach it to the side of the toilet tank or mount it on the wall using drywall screws or heavy-duty, double-sided tape.
It’s like hanging a picture frame, but for your bathroom! 🖼️
Turning on the Water Supply
Almost there!
Slowly turn the water supply valve back on and listen for the sweet sound of success as the tank fills up. 🎶
Testing the Bidet Spray
Last but not least, test the sprayer by turning on the valve located on the outside of the T-valve.
Point the sprayer at the toilet bowl and gently compress the trigger.
Check for leaks, and if everything is leak-free, your bidet sprayer is installed and ready to use! 🎉
Professional Assistance & Troubleshooting
When to Seek Professional Help
While installing a bidet sprayer is a task that many DIY enthusiasts can tackle, there are moments when professional help might be the best route. 🧐
- Complex Plumbing Systems: If your bathroom has a unique or complicated plumbing system, it might be wise to call in a pro.
- Quality Concerns: Want that top-notch, polished finish?
A professional plumber ensures quality and durability.
- Cost Considerations: Think twice!
DIY can save money, but if you’re unsure, professional installation might prevent costly mistakes.
A study shows that installing a bidet attachment, including professional installation, could cost up to $1000 on average, ranging between $400 to $2500.
Common Troubleshooting Tips
Encountering a hiccup during installation?
No worries!
Here are some common troubleshooting tips to guide you. 🛠️
Water Leaks
Leak after installation? Tighten connections and use PTFE seal tape.
Test the sprayer 6-7 times to ensure no leaks.
Water Pressure Control
Sprayer pressure too high or low? Adjust the valve on the T-valve or check for blockages in the hose.
Bidet Spray Holder Installation
Having trouble mounting the holder? Ensure you’re using the right tools like a drill or heavy-duty tape.
Position it near the water supply line for convenience.
Bidet Spray Testing
Sprayer not working as expected? Check connections, water supply, and test multiple times to ensure functionality.
Final Thoughts
Remember, installing a bidet sprayer is like assembling a puzzle. 🧩 With patience, the right tools, and a little guidance, you can do it yourself.
But if you find yourself stuck, don’t hesitate to call in a professional.
They’re there to help, after all!
Wrapping it up!
Splish, splash!
You’ve done it! 🎉 With this guide, that once-intimidating bidet sprayer is now your bathroom’s shiny new centerpiece.
Whether you were a hands-on hero or chose to call in a professional, you’ve elevated your bathroom to a new level of cleanliness and comfort.
Ready to embrace a refreshing change?
Your upgraded throne awaits!
Feel like a plumbing pro?
Share your installation experience below, and let’s celebrate your DIY success together! 🚽💦 Happy spraying, friends!
FAQs
How do you put on a bidet spray set?
To put on a bidet spray set, you’ll need to disconnect the water supply line, install the T-valve, attach the hose to the T-valve, mount the bidet spray holder, turn on the water supply, and test the bidet spray. It’s essential to follow the manufacturer’s instructions and use the proper tools for a successful installation.
How do you use a bidet sprayer?
To use a bidet sprayer, you’ll need to turn on the valve located on the T-valve, aim the sprayer at the desired area, and gently compress the trigger. Adjust the water pressure as needed for comfort, and always test the sprayer in the toilet bowl first to avoid surprises.
Is bidet spray good?
Yes, bidet spray is considered good for personal hygiene, water conservation, and environmental sustainability. It provides a gentle and effective way to clean, reduces the need for toilet paper, and can be a valuable addition to any bathroom.


